Some posts on this web site include affiliate hyperlinks. For those who e book or purchase one thing by way of these hyperlinks, I earn a small fee (at no additional value to you). Check out my privateness coverage for extra info.

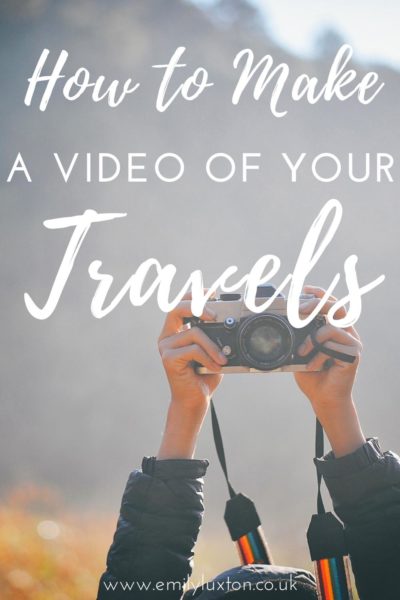
Right here’s make an superior journey video, at no cost, utilizing Filmora video editor software program…
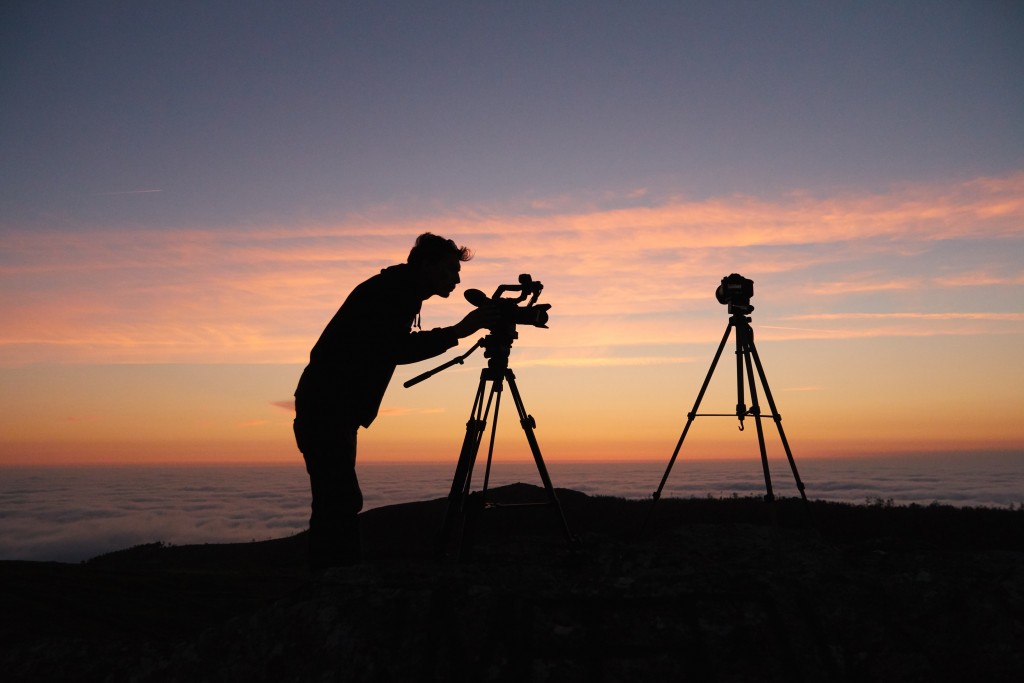
There’s actually no higher means of capturing your journey reminiscences than by making a film of your journey. And also you don’t should be an expert journey vlogger, have wonderful gear, and even spend any cash, to do it!
On this weblog put up, I’ve included a brief video I produced from my current journey to Sri Lanka. I shot the entire thing on my cellphone (no fancy gear) and edited it utilizing Filmora video editor – which is free to make use of.
I’m right here to indicate you use Filmora to create your personal journey movies! It’s tremendous simple to make use of, so anybody can create superior, professional-looking motion pictures with out a bunch of technical data.
Only for clarification, I used to be already a HUGE fan of Filmora earlier than they reached out to me about penning this evaluation put up. I’ve been utilizing their video editor software program to make my journey motion pictures for a number of years and completely love them.
Apart from a number of early movies, all of the movies on my YouTube channel had been edited utilizing Filmora. So after I suggest Filmora as the perfect video editor, it’s a real suggestion!
Learn on to search out out edit your personal journey video utilizing this superior software program…
Do you Want a Video Editor?
It usually appears like everybody needs to be a content material creator within the digital age. Particularly relating to showcasing our travels.
Between TikTok, Reels and Tales on Instagram, Fb movies, and YouTube… there are such a lot of methods to indicate off your journey movies. There are some free smartphone apps that may show you how to edit movies for social media – however they could be a bit fiddly and aren’t all the time the very best quality.
If you wish to make a extremely nice journey video to recollect your travels – one which you would show on your house TV, and even share publically on YouTube – you must search for an honest video editor.
Why Filmora is the Greatest Video Editor
A number of years in the past, I did a bunch of analysis in search of a extremely good, free video editor for Home windows. Filmora was really helpful again and again, so I downloaded it.
After a number of years of solely utilizing Filmora to make my journey movies, I nonetheless suppose it’s the perfect editor for amateurs like me. It’s free to obtain, it’s SO simple to make use of, and with each replace, the software program will get higher and higher.
Plus, there’s an enormous library of free results, transitions, titles, and different parts to assist take your movies to the subsequent stage. If you’d like entry to much more, there’s a two-tiered subscription service with tons extra results and parts. However you may nonetheless make sensible movies utilizing simply the free choices.
To indicate you simply how simple Filmora is to make use of, I’ve outlined make a easy journey video beneath. I’m in no way technical and often suck at stuff like this – so if I can determine it out, I promise you may!
My Journey Video – Edited with Filmora
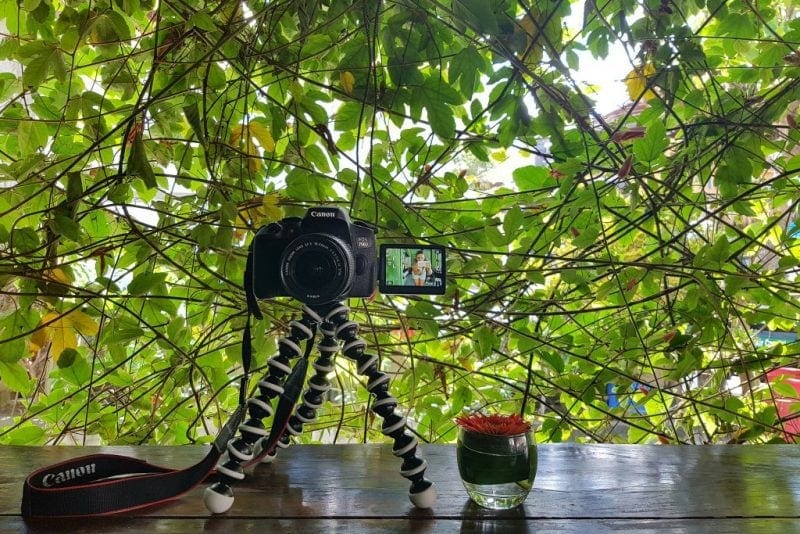
My video of glamping in Sri Lanka was shot on my cellphone and edited in Filmora.
The way to Use Filmora to Make a Nice Journey Video
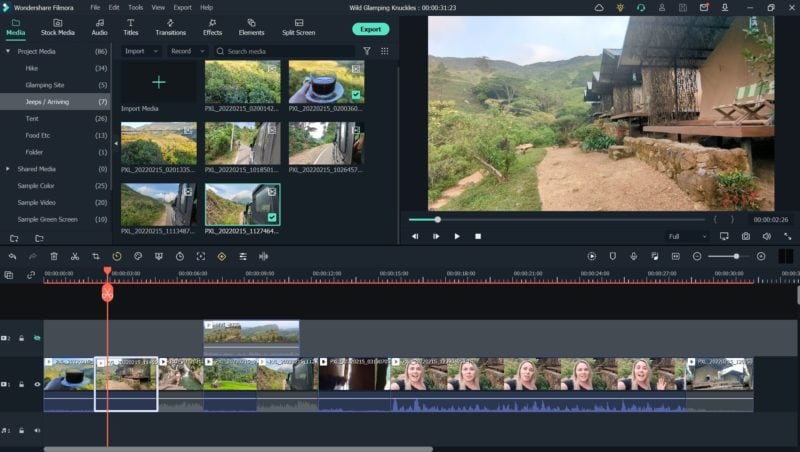
Step 1 – Load your video clips into the software program
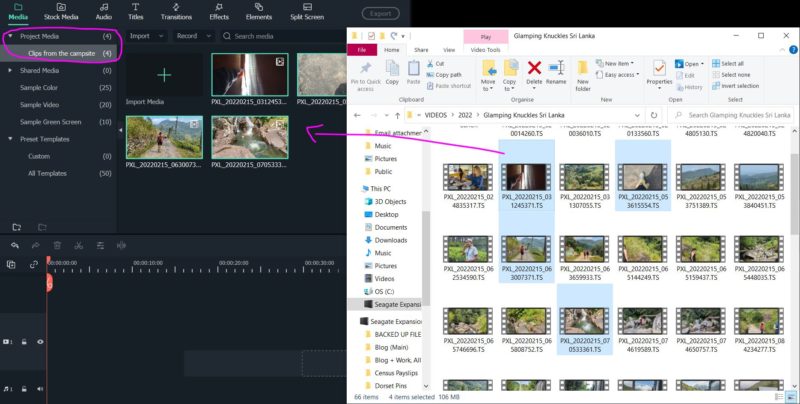
Open up Filmora’s video editor and create a brand new undertaking. You then merely click on and drag your video recordsdata into the “Mission Media” part beneath the “Media” tab.
High tip – the perfect facet ratio for a YouTube video is 16:9.
When you’ve got a whole lot of video clips (I all the time do), I STRONGLY suggest creating labelled folders first and dragging particular person recordsdata into every folder, that will help you discover issues simply while you begin enhancing.
You’ll additionally need to add any music tracks you need to use to your video. Filmora’s free plan comes with fairly a number of easy music tracks you should use – and much more of their paid variations – or you would supply your personal.
In case your video is only for private use, any observe needs to be high quality – however for those who plan on sharing the content material on a platform like YouTube, you must be sure to have the rights to make use of any music.
Step 2 – Order and Edit your Clips
When you’ve found out which clips you need to use to make your journey video, you can begin placing them so as!
Merely click on on the observe in your media library and drag it immediately onto the video observe on the backside of the display. As soon as it’s in, you may make the clip shorter by clicking and dragging both finish of it to the specified size, or snip it utilizing the orange scissors icon.
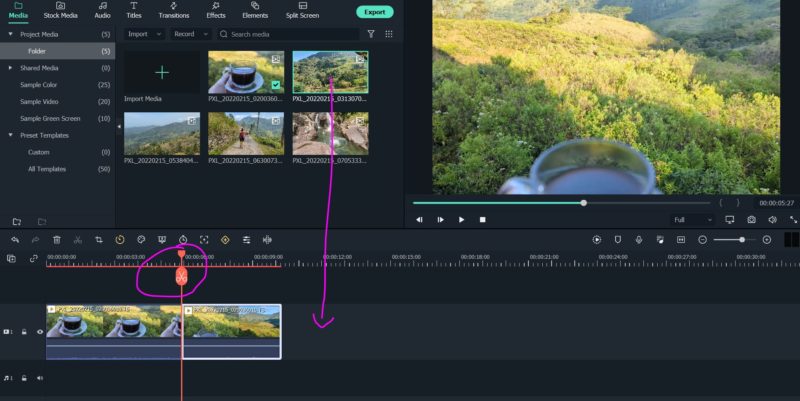
Proper-click on the clip in your video observe for some additional enhancing choices. For instance, you may mute the observe if it has undesirable audio, or use the pace editor to sluggish it down or pace issues up.
Color Correction and Different Edits
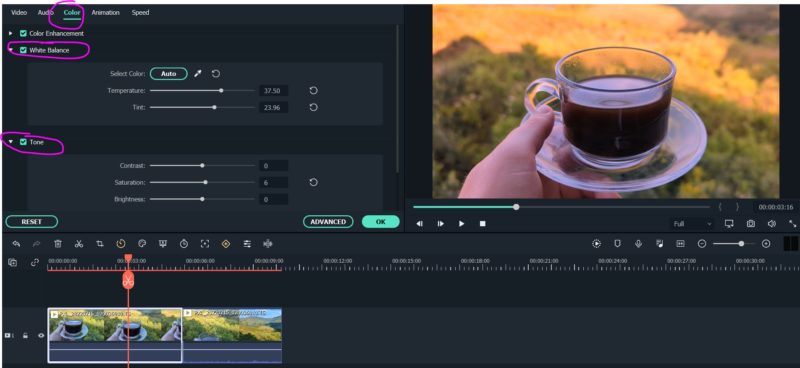
If you wish to get a bit extra technical, you too can do additional enhancing on the “Video” web page. Double-click on a video clip to open it, and also you’ll discover numerous settings to do issues like rotate the clip or add stabilisation.
Click on by way of to the “Shade” tab to edit the looks of the video itself. You may tweak the temperature and tint of the colors beneath “White Steadiness”, or change the brightness, saturation and distinction beneath “Tone”.
It’s not likely needed, so you would skip this for those who’re proud of the way in which your footage seems to be. However when you have a clip that appears a bit boring, a number of small tweaks on this web page could make a distinction.
Including Music and Voiceovers
For those who’re utilizing music in your video, discover it in your library and drag it onto the audio observe on the backside, beneath the video observe. Once more, you may click on and drag the top to shorten the observe, or use the snip device to chop it down.
You may additionally add a second audio observe so as to add voiceovers and sound results. You may document voiceovers immediately on Filmora utilizing your laptop’s microphone, or add them individually. I document mine sitting beneath my cover (to do away with background noise) utilizing my cellphone’s recorder software program, then drag them into Filmora so as to add to the video.
High tip: When you’ve got any speaking in your video, you may need to decrease the music throughout these elements. Within the “audio” tab you may add a quantity keyframe to simply change the audio in numerous elements of 1 observe. Watch this video to see how.
Step 3 – Add Transitions and Results
When you’ve acquired all of your clips so as and also you’re proud of the timings and so forth, it’s time to get inventive. You may add particular results from Filmora’s enormous library (many are free).
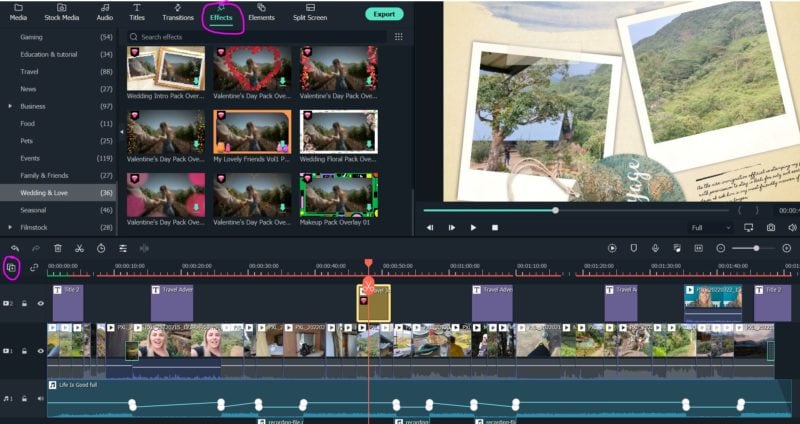
Results
Beneath the “Results” tab, you’ll discover frames and overlays so as to add over a clip (nice for a title web page maybe), in addition to graphics and animations. You might add lens flares or twinkling stars over a dreamy panorama, or a love-heart sticker excessive of a romantic second, for instance!
There are additionally stylisations and filters to alter the way in which the clip seems to be or strikes, like a sketch impact (suppose that “Take On Me” music video from the 80s) or glitchy distortions. The library is VAST, so have a mess around and get inventive.
So as to add your results, click on on the plus button above your tracks format (circled in pink on the beneath screenshot) and add a 2nd video observe. Then drag your chosen impact onto this new video observe, above the clip the place you need the overlay to indicate.
Transitions
Transitions are additionally a extremely nice technique to take your journey video to the subsequent stage. These are results that play between two video clips with a purpose to transfer from one to the subsequent – or to fade to black.
You need to use one thing easy, like fade or dissolve, to transition subtly between two clips. Or one thing extra inventive, like a turning web page, a retro pixelated gaming glitch, or a 3D digicam roll. Once more, there’s an enormous library to select from, so get experimenting.
So as to add, merely drag your chosen transition immediately onto the video observe both on the finish of a clip, or between two completely different clips. You may double click on on the transition within the video observe to edit the size – make it lower than 1 second for a refined, barely-noticeable transition.
High tip: You don’t want so as to add a transition onto each clip (except you need to), however they’re a great way to maneuver between two completely different scenes. Whenever you’re enhancing a journey video, a transition is a good way to indicate a brand new location.

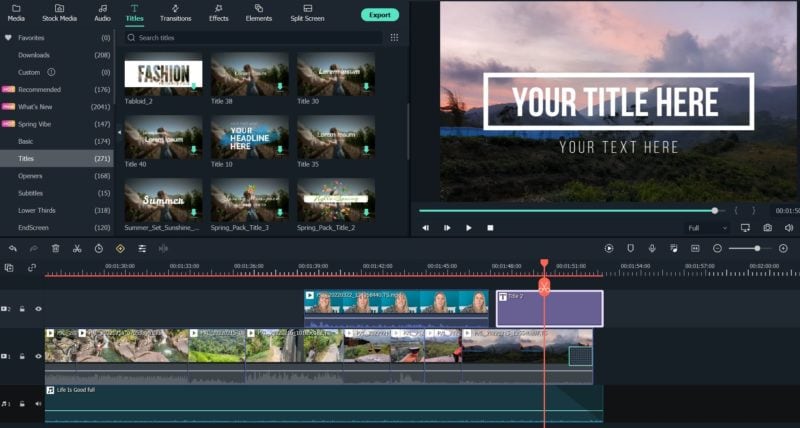
Step 4 – Add Textual content and Titles
Lastly, you may add textual content to your video – like a gap title, captions and subtitles, or headings for various scenes of the video.
I like so as to add a gap headline excessive of my first few photographs (I all the time use the identical one), then “Decrease Third” subheadings to show the completely different places all through my journey film.
Lots of the titles and textual content choices are animated, and there are LOADS of fab free choices within the Filmora library. So have a browse and mess around to search out your type.
Merely undergo the “Titles” tab to go looking the textual content library for one which fits you, then drag it onto your video observe. If you’d like the textual content to look excessive of your video, drag it onto a second video observe – like we did with the consequences.
You may as well drag it onto the primary video observe if you would like the textual content to look all by itself, like a full-page opening title, or credit on the finish of your video.
Step 5 – Export your Video
When you’re blissful along with your video, you may export it to make use of nevertheless you need. Filmora have an choice to add straight to YouTube or Vimeo, however I like to recommend exporting the file first and importing manually.
Click on “Export”, then “Create Video”, and choose the file sort you need (often MP4). I have a tendency to depart most settings as they’re – however click on on the “Settings” button and change the standard to “Greatest” earlier than clicking export to avoid wasting your video.
Bonus Step – Get Artistic
When you’ve mastered the fundamentals and really feel such as you’re attending to grips with Filmora’s software program, you can begin getting inventive.
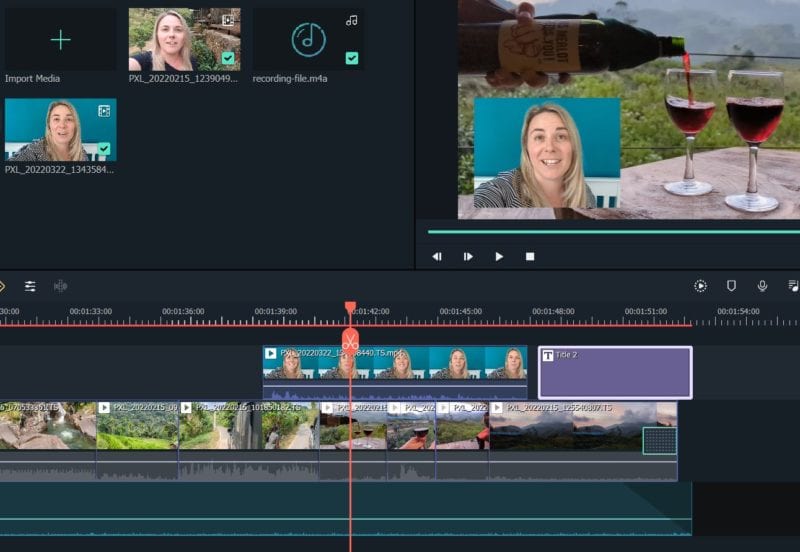
This video editor makes it very easy so as to add in additional, professional-level touches. For instance, you may simply add a “image in image” impact to have a smaller video excessive of the primary one – just like the “speaking head” field on the finish of my video.
Head to Filmora’s YouTube Channel to search out a great deal of actually useful how-to guides and tutorials that will help you take your journey video enhancing to the subsequent stage!
Last Ideas
There may be SO MUCH you are able to do with the Filmora video editor, and it’s really easy to make use of when you get began.
I are likely to hold issues pretty easy, as that’s my most well-liked type – however you may create rather more elaborate movies than mine. Experiment, mess around, and revel in it. And be at liberty to remark beneath with hyperlinks to any journey movies you create utilizing Filmora! I’d like to see them!
Learn Extra
Journey Pictures Equipment and Necessities
So, that was make a journey video utilizing Filmora! Any questions be at liberty to succeed in out within the feedback and I’ll attempt to assist!