“Pictures is all about mild.” That is an expression we regularly hear within the pictures business however one we give little thought to. Why? Widespread perception is that composition is the whole lot on the subject of pictures. However this isn’t the case. Pictures is outlined by mild.
Let me clarify.
Years in the past, throughout a tenting journey with my household, I got down to conduct my first true pictures experiment to raised perceive why pictures is all about mild. We arrange camp on the seaside of a small lake nestled within the Laurentian Mountains simply north of Montreal. As a result of it was a household tenting journey, we had a really relaxed schedule and I had loads of time to experiment with my digital camera.
Associated: The best way to View, Edit and Delete the EXIF Information in Our Pictures
I arrange my new Canon Digital Insurgent on a tripod and took one image each hour with out altering the place or the settings of the digital camera. I took 17 photographs whole.
As soon as I returned house, I analyzed the photographs in Photoshop (as a result of Lightroom didn’t but exist) and was utterly astonished by the outcomes. The situation was solely unrecognizable relying on the time of day. The photographs taken in the course of the center of the day had been washed out and boring, however the photographs taken throughout dawn and sundown had been vibrant and vigorous.
That’s after I found that pictures actually is all about mild.
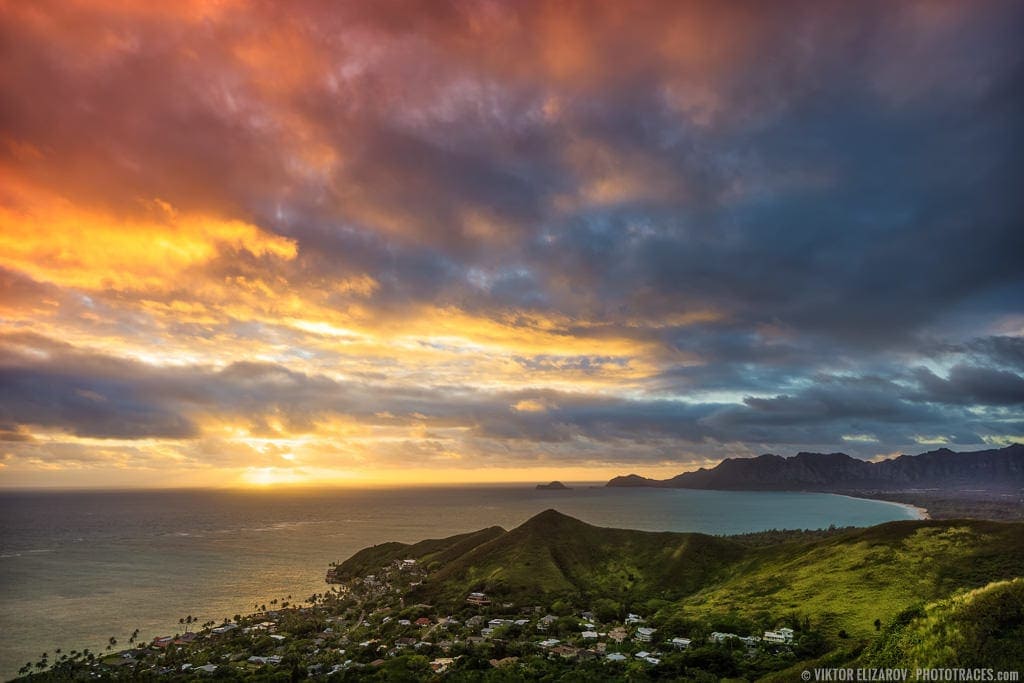
Anatomy of Mild in Sundown Pictures
It’s no shock that the solar is the predominant mild supply in outside pictures. The Earth’s ambiance acts as an enormous diffuser that softens the sunshine because it passes via.
For instance, in the course of the center of the day, the place of the solar permits daylight to journey via the ambiance virtually vertically. The daylight takes the shortest distance to succeed in the Earth’s floor, which implies that the sunshine is barely subtle by the Earth’s ambiance. This noon mild produces photographs with harsher shadows and stronger highlights.
Associated: The best way to Use a Devoted Mild Meter
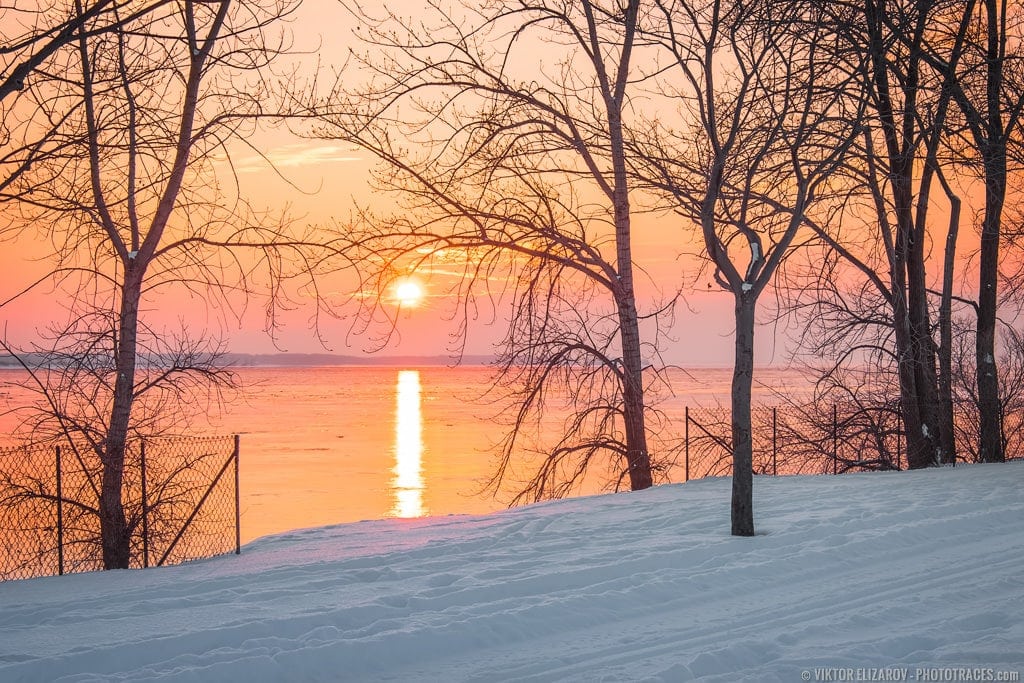
Simply earlier than sundown, the solar is low on the horizon. Which means that daylight has a for much longer distance to journey via the Earth’s ambiance. Due to this, the sunshine is much more subtle and the consequences are noticeable with softer mild, softer shadows, and softer highlights. The identical impact happens at dawn, which is why the hours earlier than dawn and sundown are generally known as the Magic Hours in pictures.
What precisely are the Magic Hours?
The Magic Hours are made up of the Golden Hour, which happens simply earlier than sundown, and the Blue Hour, which happens after sundown. They begin 30 to 60 minutes earlier than sundown and finish 30 to 60 minutes after sundown, which provides photographers wherever between one to 2 hours of favorable mild.
Golden Hour
Technically talking, the Golden Hour begins when the solar is 6 levels above the horizon and ends when it’s -4 levels beneath the horizon. Photographs captured throughout this time sometimes function tender, subtle mild with a heat golden glow and lengthy, tender shadows.
Blue Hour
The Blue Hour begins instantly after the Golden Hour when the solar is wherever between -4 and -6 levels beneath the horizon. This hour produces photos with a a lot darker sky and softer textures that includes predominantly cool, blue hues.
Sundown Pictures Ideas and Strategies
With the standard of sunshine always altering in the course of the Magic Hours, sundown pictures produces totally different visible results in a brief time frame. This additionally makes sundown pictures extremely advanced since photographers should be prepared for the adjustments and modify their methods accordingly.
That’s the reason I’ve provide you with 18 pictures ideas that can assist you take gorgeous sundown photographs!
Tip #1: Scout Your Location
Sundown pictures begins lengthy earlier than you decide up your digital camera and press the shutter button. Scouting and researching the situation is probably the most important a part of sundown pictures as a result of it’s important to know the place to point out up, when to point out up, and what to shoot.
The period of favorable mild throughout sundown is restricted and the lighting situation adjustments by the minute. This leaves us little time to experiment within the area.
I attempt to scout the situation a day previous to taking pictures sundown to extend my probabilities of success. Arriving on the location in the course of the day offers me loads of time to guage the setting by way of composition, digital camera placement, lens choice, focal size, and so on. I even take a number of photographs with my mobile phone as a reminder of potential composition choices.
Apart from snapping a number of photographs, I additionally use the Exsate Golden Hour app on my smartphone to establish the solar’s trajectory and the precise location the place the solar will contact the horizon. The app additionally pinpoints the precise time of the Golden Hour, sundown, and the tip of the Blue Hour. It actually takes the guesswork out of timing my photographs!
With the Magic Hours pinpointed, I normally arrive 1.5 hours earlier than sundown to offer myself sufficient time to arrange my digital camera and tripod.
Tip #2: Establish Components within the Foreground
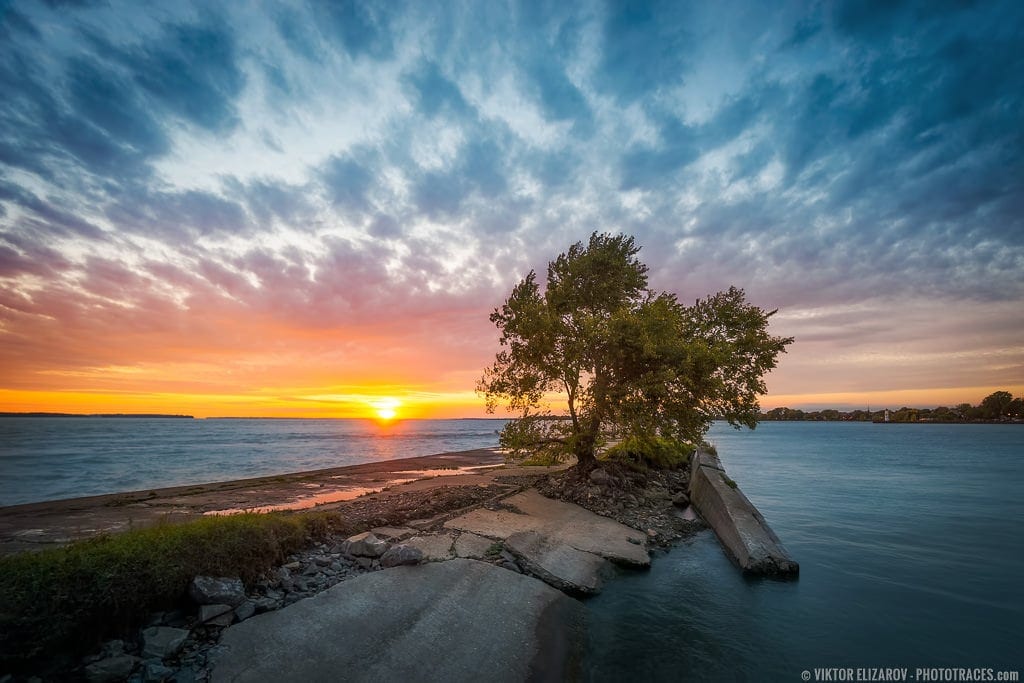
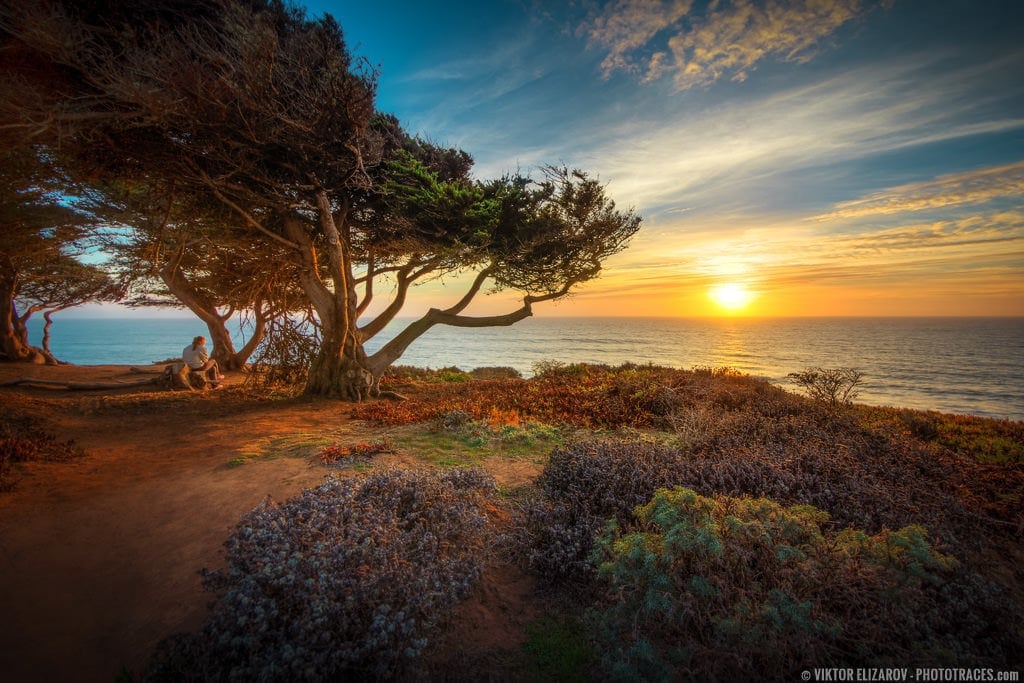
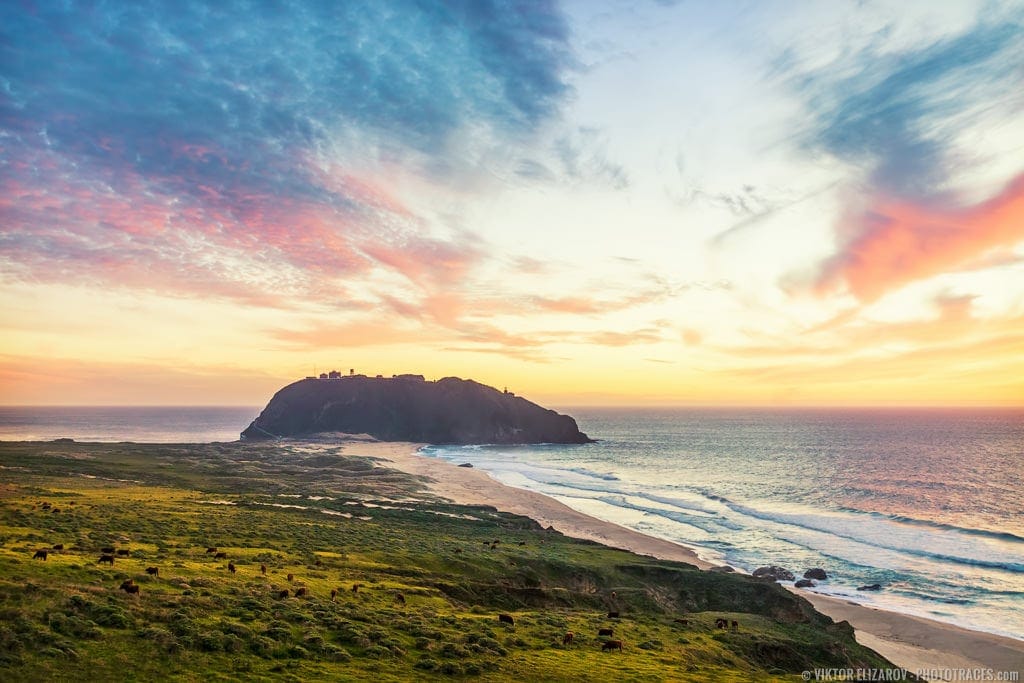
When you are scouting your location, it is very important establish numerous factors of curiosity within the foreground. It’s simple to focus solely on the attractive colours of the sky, however these hues don’t produce a significant composition by themselves. Use a focal point within the foreground like a tree, the seaside, a stream, or a rock to attach the foreground to the background. This creates a extra expressive picture that attracts viewers additional into the composition.
Tip #3: Shoot RAW
For those who comply with my weblog, you already know I’m an enormous fan of taking pictures RAW. That is much more essential when taking pictures sunsets for a lot of causes. First, it eliminates any concern concerning the composition’s White Steadiness since this setting may be nondestructively adjusted in the course of the enhancing course of.
Associated: Snow Pictures Ideas: The best way to {Photograph} and Edit
Second and much more importantly, taking pictures RAW offers you extra management over the prolonged dynamic vary of sunshine that spans from the darkest shadows to the brightest highlights. You possibly can produce a surprising picture with out clipped shadows or blown highlights by taking pictures RAW.
Tip #4: Embrace HDR Pictures
I do know HDR pictures sounds intimidating, however it’s particularly helpful in sundown pictures when the dynamic vary of sunshine is so excessive that it may well exceed the dynamic vary of the digital camera’s sensor. In these instances, you can’t seize all the vary of sunshine even when taking pictures RAW. That’s when HDR expertise comes into play.
Associated: High 6 Wildlife Pictures Ideas
The method of manufacturing HDR photos is easy and simple because of the introduction of the HDR Merge module in Lightroom 6. You now not want a devoted HDR program or Photoshop to get the job performed!
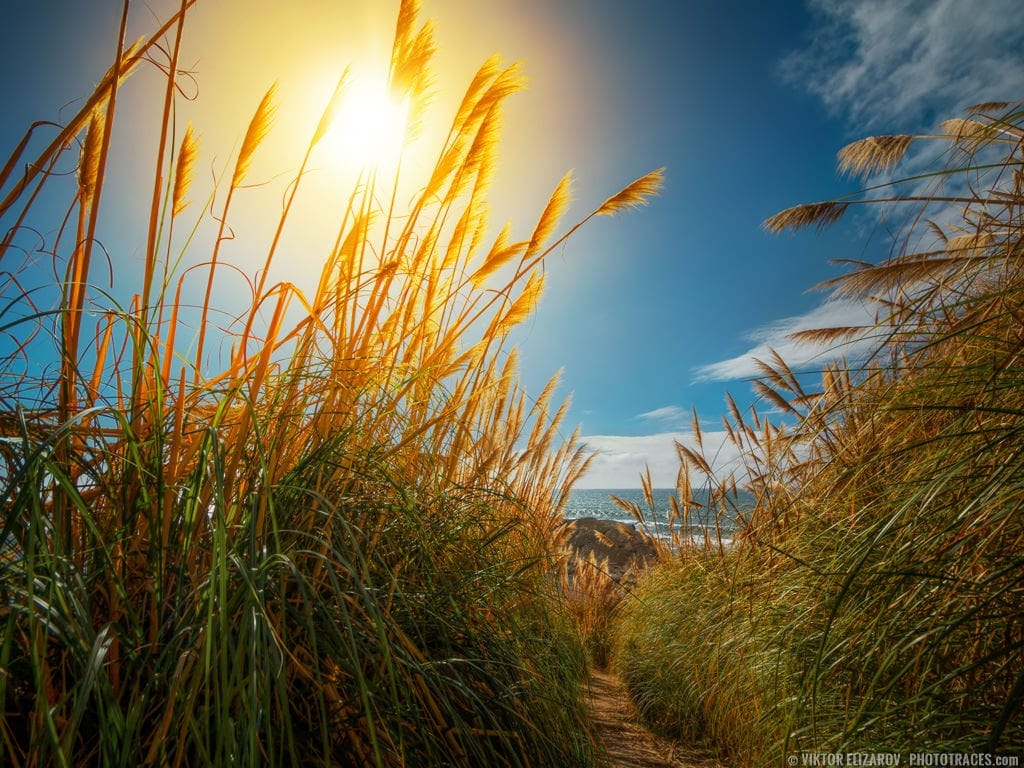
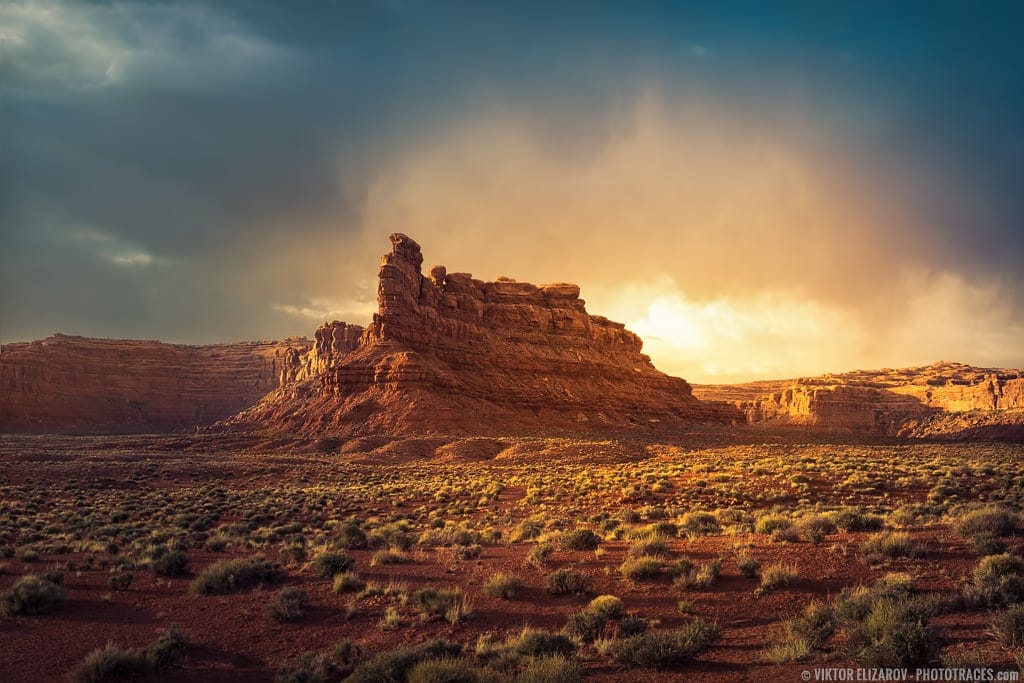
Tip #5: Shoot into the Solar
Capturing into the solar may be difficult due to the intense dynamic vary that may trick the digital camera’s meter and damage a picture with unwelcome flares from the intense solar. However if you happen to grasp taking pictures into the solar, you may create distinctive photographs which are legions past the everyday sundown photos captured with smartphone or point-and-shoot cameras.

Tip #6: Strive the Starburst Impact
The Starburst Impact is a superb approach for creating distinctive sundown photos with exaggerated and extra distinguished rays of sunshine. This system includes taking pictures immediately into the solar with the smallest doable aperture.
I at all times begin with a standard aperture after I shoot immediately into the solar. On the finish of the collection, I scale back the aperture to f/20-f/22 to create a Starburst Impact. Later, in the course of the enhancing course of, I’ve the choice of utilizing the starburst or the common picture.

Tip #7: Use Aperture Precedence Mode
As a brand new photographer, I used to be inspired to shoot in Guide Mode in tough lighting situations like sunrises and sunsets. Nonetheless, I quickly discovered that this isn’t at all times useful since taking pictures in Guide Publicity Mode slows me down tremendously.
Lighting situations always change throughout sunsets as a result of, most frequently, the sunshine is constantly reducing. Cloud cowl is a unique story, nevertheless, as a result of the quantity of sunshine that impacts the digital camera’s meter can rise and fall in waves. For me, utilizing Guide Metering Mode is inefficient as a result of I’m always reevaluating and altering the publicity.
I discover that Aperture Precedence Mode fits me the very best for the reason that Publicity Metering methods on trendy cameras are correct and superior sufficient to deal with virtually any situation. I set the ISO to 100 and the aperture between f/9-f/11 and let the digital camera robotically modify the shutter velocity.
Tip #8: Use Publicity Compensation
When taking pictures immediately into the solar in excessive situations, the digital camera’s metering system normally wants a little bit assist. In these conditions, I like to make use of Aperture Precedence Mode together with Publicity Compensation as a result of I can manually modify the publicity. Capturing into the solar requires the identical logic utilized in taking pictures snowy scenes the place the intense snow tips the digital camera’s metering system. It’s a must to use Publicity Compensation to right the problem.
Associated: High 12 Seashore Pictures Ideas
Right here’s an instance: Like in snowy situations, the digital camera’s metering system is fooled by the extraordinarily vibrant situations when taking pictures immediately into the solar. The brilliant space across the solar causes the digital camera to assume the scene is brighter than it actually is. The digital camera’s metering system underexposes the picture except we set the Publicity Compensation worth to +1EV.
Tip #9: Set the Publicity for the Brightest Space of the Scene: The Highlights
One of many primary guidelines of panorama pictures is to set the publicity for the brightest areas or the highlights of the scene. This rule is much more important in sundown pictures since you may at all times get well the darker areas of the scene in the course of the enhancing course of. The brightest areas of the scene—just like the sky and the solar—are tougher to get well when they’re blown as a result of they lack data.
To keep away from this, shoot in RAW and set the publicity for the highlights. Underexpose the shadows and get well them later throughout your enhancing workflow in Lightroom.
Tip #10: Bracket your Photographs
Auto Publicity Bracketing offers us the choice of taking a number of photographs of the identical topic with totally different publicity values. You merely press the shutter button and the digital camera takes a number of photographs at predefined publicity increments.
Why is this beneficial? Consider Auto Publicity Bracketing like added insurance coverage in case you don’t get the correct publicity with one shot. It additionally permits us to make use of Luminosity Mixing or the HDR pictures approach later in the course of the enhancing course of.
Tip #11: Use a Tripod
With all of the challenges that already include sundown pictures, utilizing a tripod could make issues a lot easier.
Capturing sunsets handheld and and not using a tripod makes all the course of much more advanced. Due to the always altering mild situations, it’s important to make sure the shutter velocity doesn’t fall beneath 1/60s and 1/100s. Protected shutter velocity calculations develop into much more difficult while you bracket your photographs and, on high of this, it’s important to always increase the ISO to compensate for the diminishing mild. This provides digital noise to your photographs that can’t at all times be mounted within the enhancing workflow.

Tip #12: Watch out for Lens Flare
When direct daylight enters the lens, a lens flare happens. Whereas a lens flare may be inventive in sure conditions, it sometimes seems to be like an oversight or an imperfection. This will simply damage a doubtlessly promising picture.
Lens flares are onerous to manage since the whole lot will depend on the standard of sunshine and the angle of the solar’s rays getting into the lens. You possibly can transfer the digital camera barely to the left or proper to vary the angle of the lens relative to the sunshine supply, however that is by no means a predictable or certain option to keep away from the lens flare impact. It additionally doesn’t assist that some lenses are extra susceptible to producing lens flares than others.
Associated: High 10 Out of doors Pictures Ideas
The excellent news is that when you understand you can’t keep away from lens flares, you may make use of a confirmed, low-tech trick to forestall the flare from ruining your shot. Take the primary shot with out taking note of the lens flare. Take the second shot utilizing your finger to defend the solar. Though your finger is within the body, it eliminates any lens flares. You possibly can mix the 2 photos later in Photoshop utilizing transparency masks. Though this creates an additional step and requires Photoshop in the course of the enhancing course of, it’s bullet-proof and a confirmed option to stop a lens flare from ruining your gorgeous picture.
Ideas #13: Use the two Second Delay or a Distant Shutter Launch
As you get additional right into a sundown, the atmosphere turns into even darker and makes for actually gorgeous photographs. Nonetheless, the probabilities of introducing blur into your photographs is even higher.
Because the scene will get darker, the digital camera retains readjusting the publicity by slowing down the shutter velocity. As soon as the shutter velocity reaches 0.5 seconds, it’s simple to introduce blur into the picture by even the slightest transfer or shake of the digital camera. To stop this, you need to use the two Second Delay performance on the digital camera or spend money on a Distant Shutter Launch.
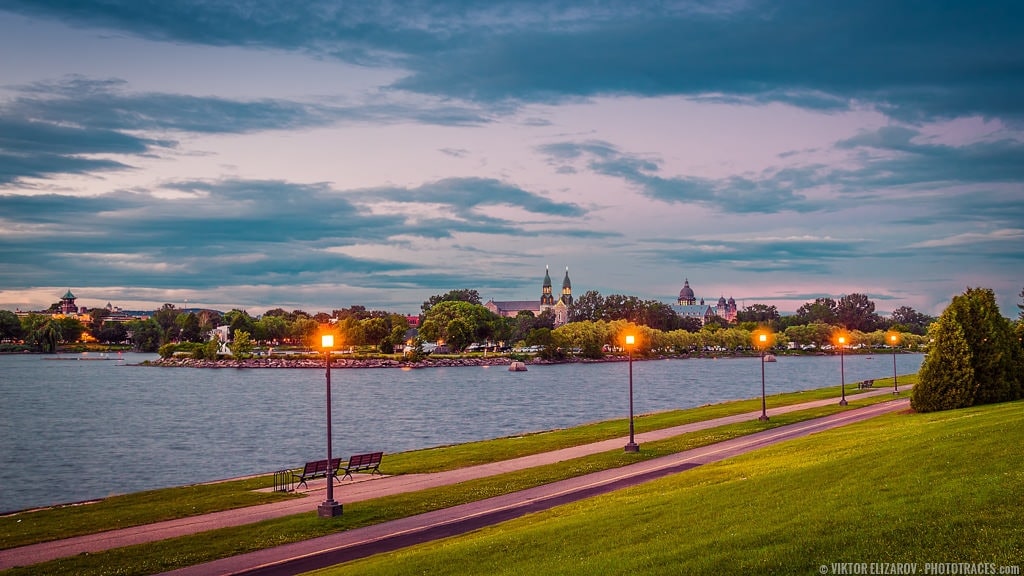
Tip #14: Await Blue Hour
Don’t depart the situation till the Blue Hour is totally over. Belief me, you’ll miss one thing unimaginable! Many rookies depart their location as quickly because the solar disappears behind the horizon, which implies they usually miss the sweetness that follows within the Blue Hour.
Associated: 9 Forms of Pictures to Strive When You Journey
The primary 5 to 10 minutes after the solar disappears gives among the most attention-grabbing pictures alternatives. Though the solar has dipped beneath the horizon, its mild illuminates the sky by softly brightening all the scene and marking the transition from the Golden Hour into the Blue Hour.
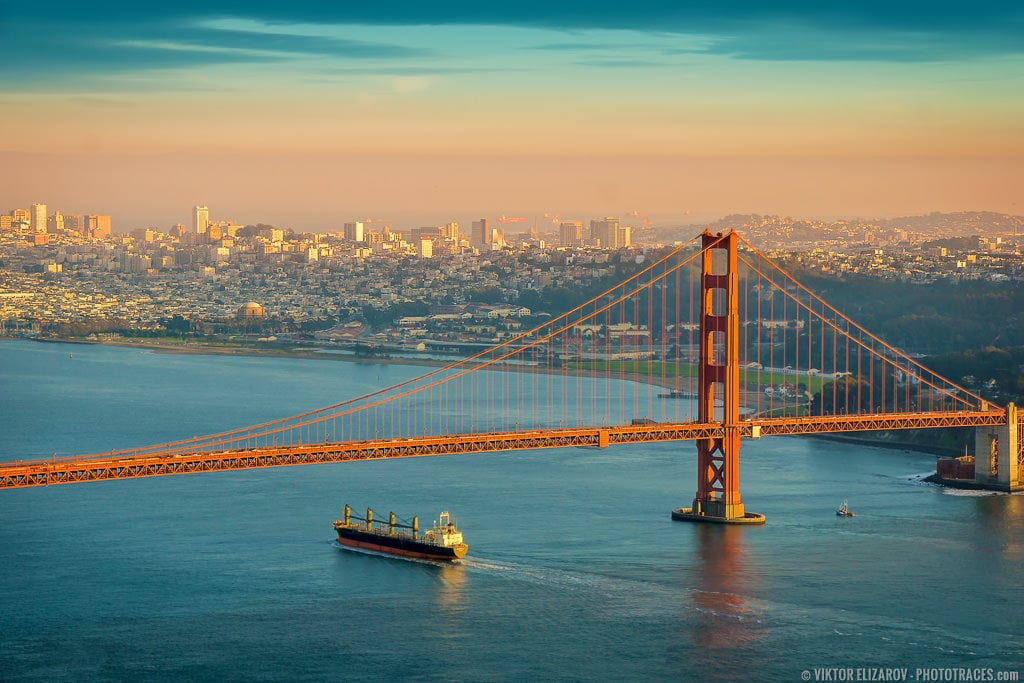
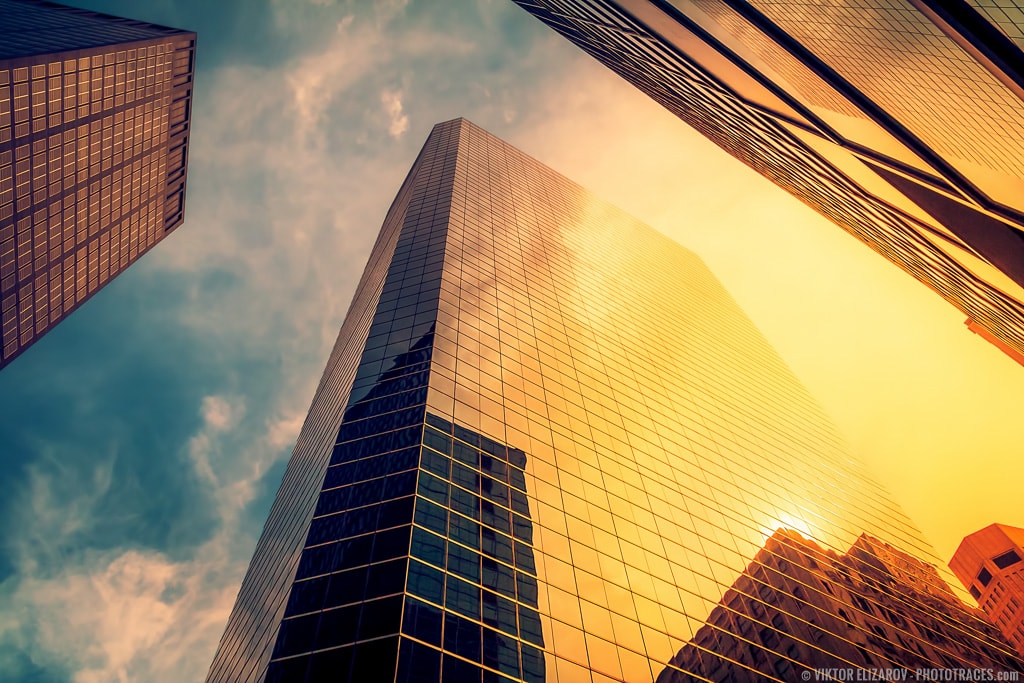
Tip #15: Seize Reflections in Metropolis Sunsets
Whereas most individuals think about extra rural sunsets, let’s not overlook the sweetness that cityscapes convey in the course of the Magic Hours. Though tall buildings can usually defend the solar even earlier than the Magic Hours start, at all times search for reflections of the solar within the buildings round you. Capturing these reflections can produce some actually superb results that you just can not discover wherever else in nature.
Tip #16: Use the Horizon as a Composition Instrument
Sundown hours produce the very best mild for pictures, however that doesn’t imply that each sundown gives the identical alternatives for stunning photos. Take into consideration a sundown with a cloudless sky and hazy air. These situations produce boring photographs. Fortunately, there’s a treatment for that!
By strategically utilizing the horizon, you may assist viewers acknowledge totally different points of the picture. For instance, if the sky is boring, you may place the horizon increased within the composition to reduce the sky’s affect on the general picture. As an alternative of specializing in the sky, you may draw consideration to one thing within the foreground like a lovely rock formation illuminated by the setting solar. Alternatively, if the sky is gorgeous, you may place the horizon even decrease within the composition to create a wide ranging point of interest.
Tip #17: Pack a Flashlight and Hotter Garments
We are sometimes so excited on the prospect of taking pictures a sundown that we overlook to plan for any after-sunset actions, particularly the hike again to the automobile or the campsite. This turns into much more worrisome since, by the point we end taking pictures and packing up our gear, the temperatures have dropped and it’s utterly darkish exterior.
This occurred to me in April on my journey to Zion Nationwide Park after I efficiently shot the sundown, solely to seek out myself in full darkness in freezing temperatures. That actuality grew to become even clearer as I took the 40-minute hike again to my automobile. With every step, I scolded myself for not bringing hotter garments or a flashlight!
Tip #18: Don’t Overlook to Look Round
It’s simple to get so caught up in a sundown that you just overlook the whole lot else round you. Whereas the sundown is actually stunning, don’t forget that the setting solar can produce attention-grabbing results on extra than simply what’s in entrance of you. I counsel taking a look at your environment each 5 minutes to keep away from lacking out on one thing actually spectacular.